ADHO MUKHA SVANASANA/ DOWNWORD DOG
Meaning : "Adho" means 'down'.
"Mukha" means 'face'.
"Svana' means 'dog'.
"Asana" means 'pose'.
This pose resembles a dog stretching itself with head and forelegs down and the hind legs up, hence the name.
Level : Beginner.
This is a great asana/pose for beginners, who have never attempted inversion poses like sirsasana/headstand, or Sarvangasana/shoulderstand. It is a mild inversion asana that helps build up upper body strength while stretching the whole body. Preparing the body for advance asanas. It is also an essential component of Surya namaskar/sun salutation and is done often in yoga class either as a resting pose, transitional pose and a strength builder pose.
WARM UP: with few rounds of
1. Rotate of your wrist clockwise and anti clockwise.
2. Shoulder rotation inwards and outwards
3. Majari Asana. Cat and cow stretch to release tension of back and warming up spine.
Three levels of Beginners variations to work steadily towards (from Variation A to C).
Technique A : With wall/ Shelf/Table or any fixed steady props.
It's safe to take the adho mukha svanasana to wall to start with. this will help toget the feel of the asana. Allowing the opening of upper shoulder and building strength of the arms and shoulders. With regular practice you can experiment with various height level using either wall, shelf, chair, table. Respectively explore the shift in stretch with changing the placement of the hands as illustrated in pics 1 to 3.

PIC 1 Start with arms placed above shoulder level

PIC 2 Arms placed at shoulder level

PIC 3 Arms coming down lower then shoulder and still up from ground.
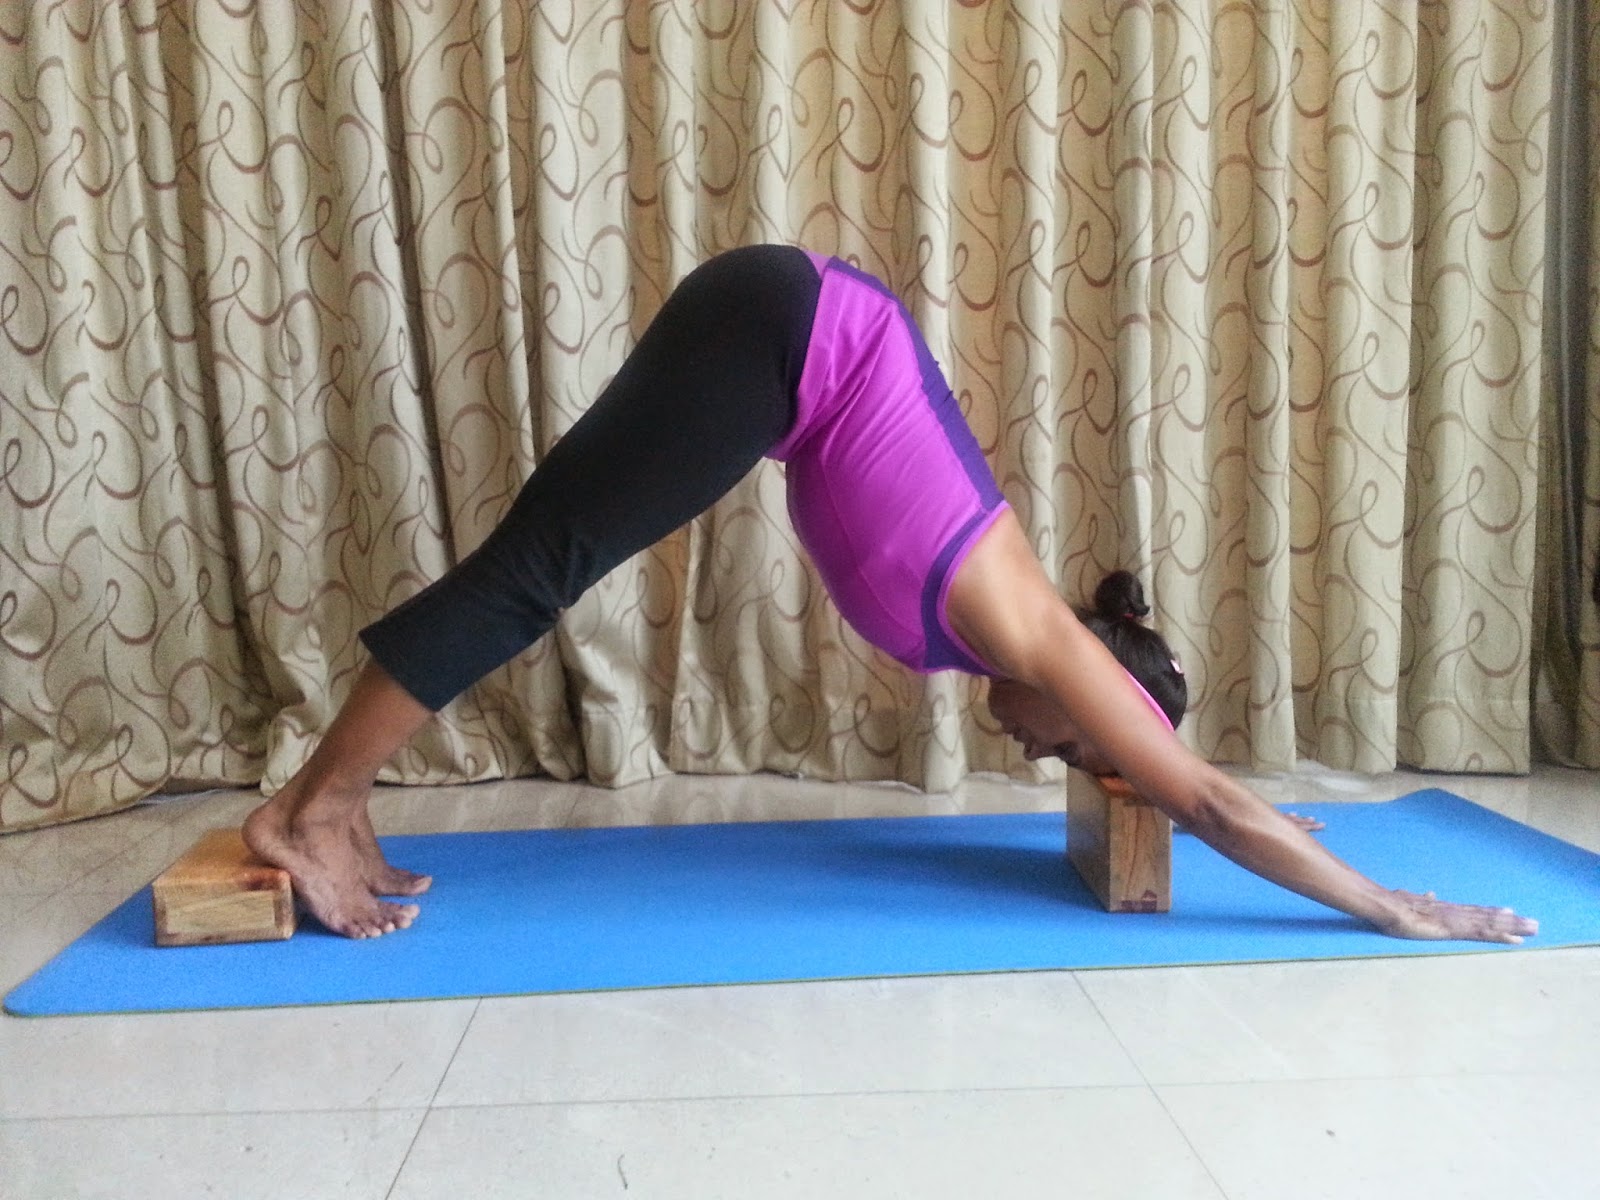
Technique B : With Blocks/Blanket(Prop).
1. Place one of your block or a rolled towel/blanket at the end of the mat.
2. Lie full length on the floor on the stomach, Face downwards. The feet should be kept one foot apart and the toes touching the block or blanket behind you.
3. Rest the palms by the side of the chest, with fingers spread apart and pointed in front.
4. Exhale and raise the trunk from the floor. Staying on your knees. Place the second block, thick book or a rolled towel/blanket at center in line with your forehead.
5. Place the crown of your head on your prop. Keeping elbow straight and lift the knees of the ground and extending the back.
6. Keep the knee straight and place the heels on the prop placed behind your feet. Ears in line with upper arms as shown in pic A below.
PIC A
7. Stay here in the pose for few breath. Allow the body to get use to the stretch. Once steady move the shoulder blades towards each other as close as possible maintaining your body comfort. Shown in Pic B below.

PIC B
8. To come out of the pose. Exhale. Gently bend your knees and bring knees down on mat. Keeping toes together and heels apart. Place your hips in between the heels and relax in Shashankasana/child pose as shown in pic C

PIC C
Technique C : Without blocks
1. Begin on your hands and knees down on mat in table top position. Wrist in line under your shoulder and knees in line with hips. Knees open hip width apart.
2. Spread the fingers wide apart. Palms and fingers press firmly on mat. Distributing your weight evenly across both hands.
3. Tuck your toes. Exhale life the knees off the mat. Lifting your hips up, slowly pushing your hips behind you.
4. Gently straighten your legs completely and brings the heels on the mat. You body will resemble the shape of an "A". Do not walk your feet closer to you hands and maintain the extension of your whole body.
5. Stay here in the pose for few breath. Keeping the gaze toward your feet.
6. To come out of the pose. Exhale. Gently bend your knees and bring knees down on mat. Relax in child pose.

Beginner tips: Keep the following information in mind when you practice this pose.
- If you are tight on hamstring and find the stretch intense at back of leg or your knees. keep the knees slightly bent initially to maintain a comfortable stretch.
- Don't worry if in beginning the heels are not touching the ground. The stretching of legs muscles in this pose will increase the flexibility with regular practice. Avoid walking your feet closer to your hands for this purpose.
- If you experience any pain in the wrist or hand in the pose. Note that this is a common problem, especially if you are new to yoga. The hands and wrist are not used to bearing the weight of the body. The trick is to place the fingers on the hands on the mat and place the palm on blanket to keep them slightly lifted and cushioned, as shown in Pic below.

An illustrated image from web.
Benefits :
1. This pose is also known as an exhilarating pose. Considered as a mild inversion because the trunk is lowered and fully stretched in the pose yet high then head. Hence the blood from upper body travel toward head, bring fresh blood and rejuvenating the brain cells. Those who are hesitant to practice sirsasana/headstand can attempt this pose.
2. As the Abdominal muscles are lifted the diaphragm moves up towards chest cavity slowing down the heart beat. So this pose can be down by people suffering from high blood pressure.
3. Eradicates stiffness in the shoulder blades region and arthritis of shoulder joints.
4. This pose is especially beneficial for runners who get tired after hard race, as longer stay in this pose remove fatigue. Sprinters will develop speed and lightness of the limbs.
5. Relieves pain and stiffness in the heels and strengthen the ankles and makes the legs shapely.
Caution:
Do not practice this pose if you have severe carpal tunnel syndrome. In late late term of pregnancy. Have an sever injury to the back, arms or shoulders. Are prone to vertigo. Always work within your own range of limits. If you have any medical concerns, talk to your doctor before practicing.
Hope you find the above post helpful and will try the modification to deepen your practice. Do your your experience and inputs in the comments.
Namaste..